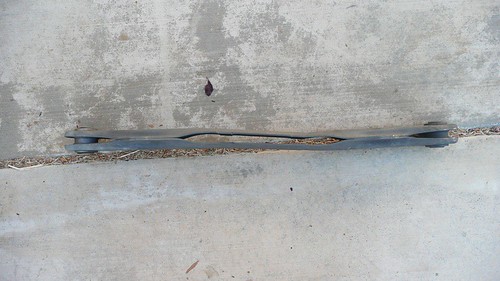
That is what the rear control arm from the drivers side of my MINI looked like. See where the bend starts? That exactly the same spot on the passenger side where the break occured.
Removing this one took a bit more work than removing the broken one. Although the bend doesn’t look that severe, it was probably off by close to an inch. It was wedged in pretty tight but, with my brother-in-laws help, we got it out.
Here is the difference between the two.
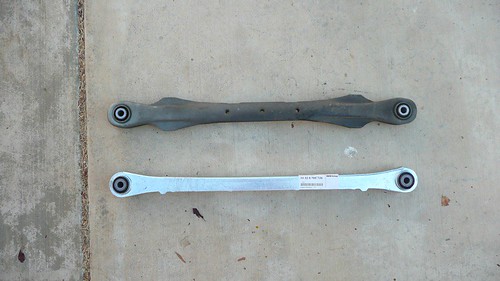
The revised control arm for the ’02-’06 MINI is the one on the bottom. It’s a solid, 1 piece design that is lighter than the original and felt quite a bit stronger.
The top is OEM for ’02 and very early ’03 MINIs (I believe). It’s actually constructed from 2 pieces of steel stamped together then drilled. It’s quite a bit heavier than the new one and those holes, as I have found, are a serious weak point in the unit.
As I mentioned before, the installation was very simple and straightforward. You’ll need an 18mm socket and box end wrench. Total time to replace both should be 30 minutes or less. They aren’t that expensive either from your dealers parts desk, coming in at about $150 each.
If you look under the back of you MINI and see that you have the older design control arms, you should definitely inspect them when you get the chance. If they are bent in any way, you should replace them as soon as possible, especially if you are getting funny wear on your rear tires or your MINI doesn’t quite handle or ride the way you remember it did when you first drove it home.
Now my MINI rides like it should. Handles like it should. Stops like it should. And has the original ride height too. More pictures will be coming to compare before and after later in the week.
Confused then … if the new arm is more robust and lighter, why did the old one ever exist?
Lighter = less metal = less cost, and the new cast one must need less machining/assembly than the old multi-piece part, too.
Confuses me too. But, if I had to guess, the old one was the original Rover design. I would also guess that someone realized it’s weakness pretty early on, which would explain the resdesign.
Dang dude!!! That sucks… I think I may have to preemptively replace these since I’ve got an ’02…
And you probably have the drilled pieces too. Go in and talk to Teresa I’m sure she’d give you a good price too ;)